Why Create your own Website (other than the obvious reason... because it's free + easy)
Seriously... why take the time to create your own website instead of just paying Wix, Blogger, or another website company to create a website???
In a world that is becoming more and more technology focused and driven, being at least aware of how the a website works, even on a very basic level won’t ever hurt. In fact, knowing a few secrets behind website can keep you from getting taken advantage of in the future. Let’s face it, we all need technology in our lives, but we don’t need the extra cost for it.
My favorite thing about the tech industry, is how strong the open source community is. Seriously, there are people willing to help and answer all of your questions. People who fix your code, provide resources, and spend their free time creating technologies for you to use… for free! The only difficult parts, are:
- Understanding what they are talking about
- Figuring out where these resources are
Don’t worry, I will walk you through both, and by the end of this post, you will have a basic understanding of the websites, HTML, and computer systems. We will go through everything slowly, and I will hold your hand the entire way. This post will be very long, but it will be worth it.
Choosing your website template
Each website has a personality. Eventually, when your blog supports millions of viewers a day, you will probably need a fully customizable website built that matches your brand. You will get there… But before you are on that level, we will cheat a little and start with a template.
A Jekyll template is a website structure that is built for blogs. Like in a house, Jekyll provides the structure of the building, the theme designs the floor plan, and your blog posts will fit in as the furniture.
There are hundreds of Jekyll themes. Each template is built the same, but designed differently. Luckily each template has a great instruction set of how to easily modify the design to customize it to your needs. Feel free to browse different website themes at http://jekyllthemes.org. The template I am going to walk you through is the Clean Blog Theme
Feel free to choose a different one if you would like. The general setup for each will be the same. But if there is ever a difference, and you get confused, shoot me a message on IG @jocee.holladay and we can walkthrough it together.
Getting to the technical part
The next few steps might be very confusing. You honestly don’t need to understand what exactly is going on, we just need to set up your computer so that you can code! Look your basically, already, sort of, a developer!
Step 1: Downloading Programs
We need to install a way to edit the code This is called a IDE or editor. A good one for beginners is Visual Studio Code, you can download that here.
You will also need to download Git. I’ll explain Git later. https://git-scm.com/downloads
Step 2: Downloading template code
We need to copy the template code. In order to customize the website to make it yours, and to add blog posts, we need to copy the template, and add your additions. Copying code is simple, you go to the online location, where the code is stored (this location is called a repository) where the template code is stored, and use git (downloaded in step 1) to copy the code onto your computer.
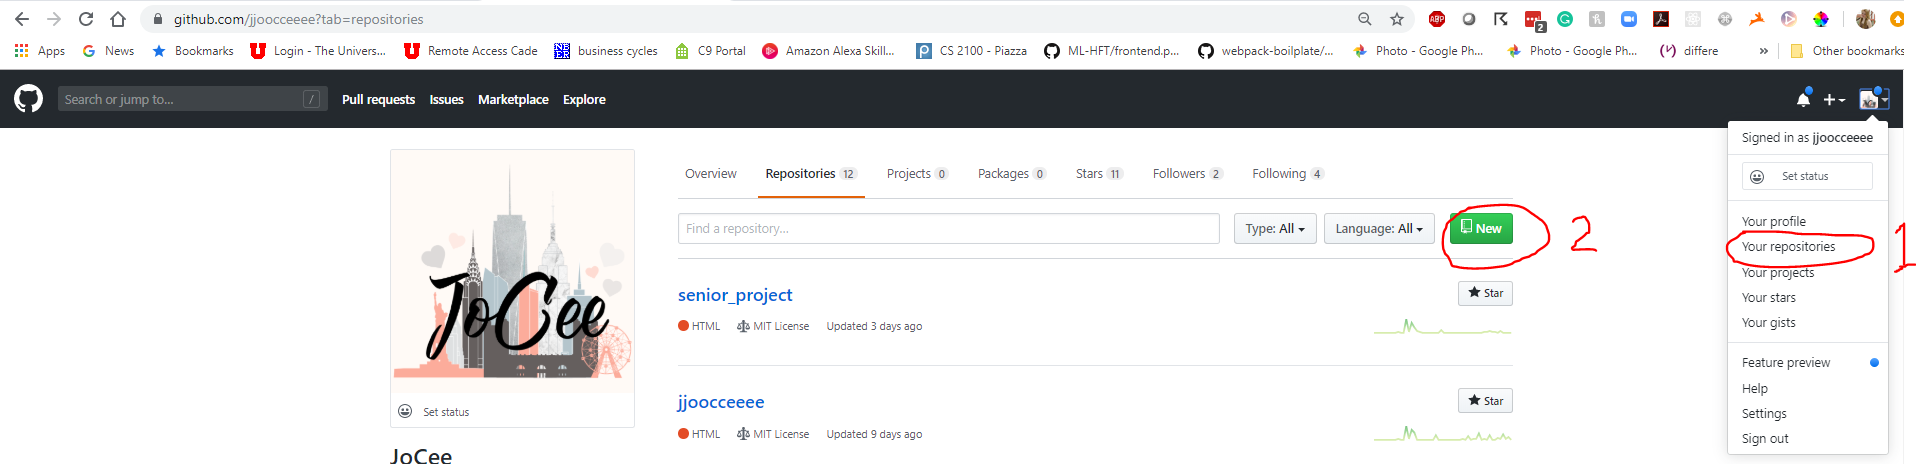
First, let’s get our ducks in a row and create a GitHub account if you don’t have one. GitHub is the secret sauce that will host your website for free. Don’t skip this step. Having a GitHub account makes you like a real techie! So congratulations are in order.
An account can be created here
Once your account is created, you will go to the site where the repository is. Remember, a repository is basically an online location that stores code. Every major project has a repository. Your website will even have it’s own repository too!
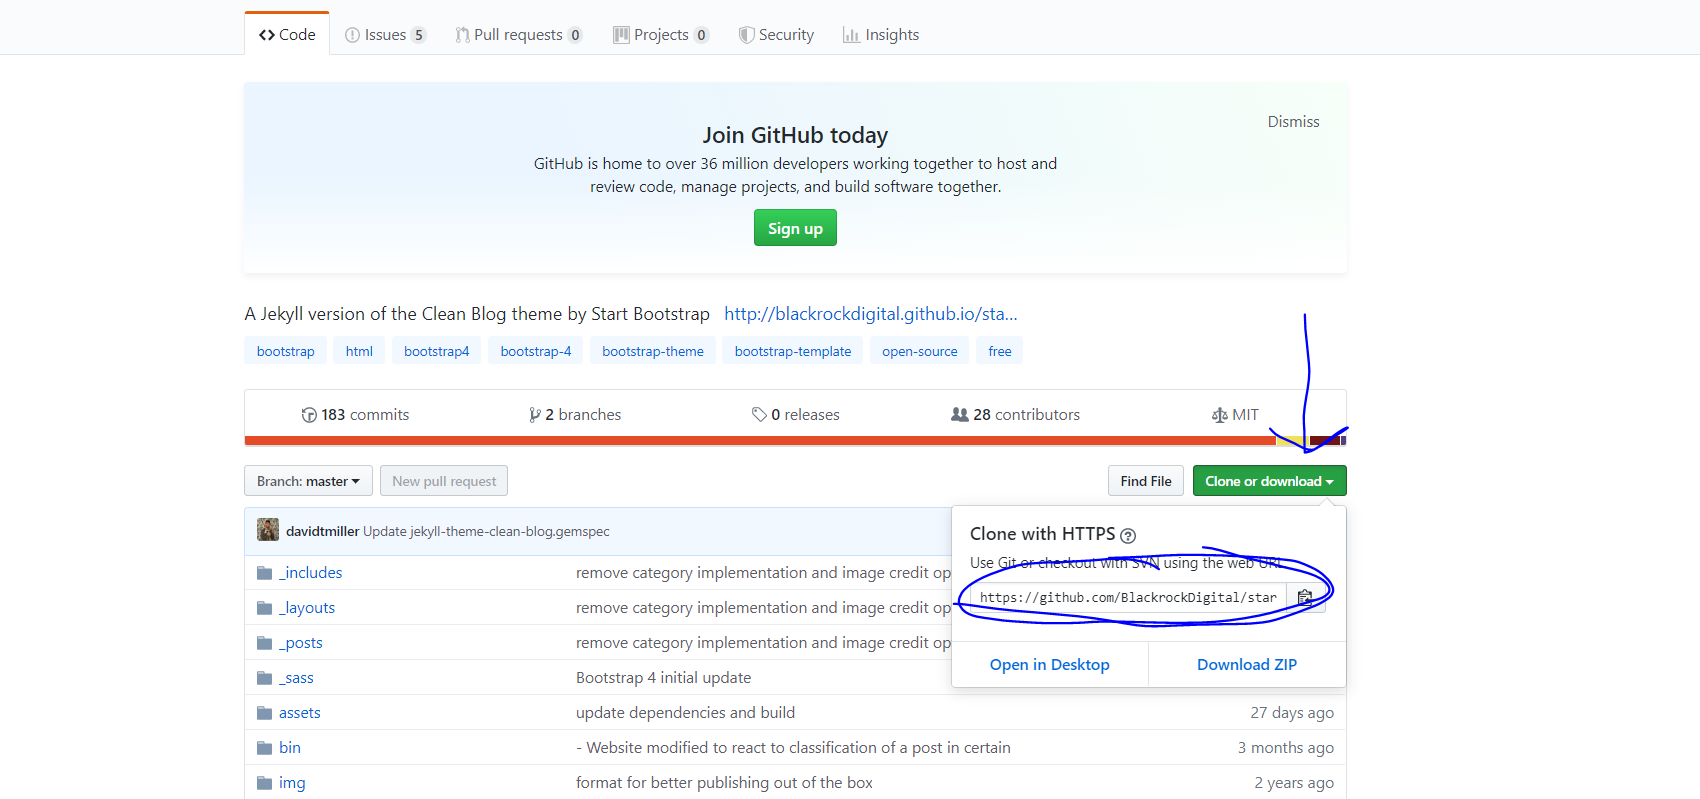
Github Repo for The Clean Blog
This is what it looks like. We will need to clone this repo. This is done by pressing the clone or download button. Leave this open, we will come back here shortly.
Before we can copy/ download the code for this template, we need to create a place that we want to store the code. This can be anywhere on your computer. Put it in Documents, Desktop, anywhere you want. Just find a place you won't forget.

File System with new folder to store my blog
Once you have created a folder for your website to be stored on your computer, we will need to get the path to that location. A path is just a pointer to a certain file location.
You can get the path by just copying the location in the top navigation bar. In my case the path is C:\Users\jocee\Documents\side_projects\blog_posts\freeWebsiteBlog
Copy your path, we will be using it shortly.
Now we will do a few things on the command line. The command prompt (also referred to as the command prompt) is simply a way to control your computer without the pretty and colorful displays that you are used to. Everything you do with a mouse, can be done on the command line.
To get to the command line press the windows key or start button (bottom left) and type “cmd”, select the command prompt. If you are using a Mac, instead of a command prompt, you will use the terminal.
Remember how you copied your path? Well we are going to get to that location through the command prompt. In the command prompt type in “cd” (short for change directory) then your path that you copied from above.

cd stands for Change Directly, can it is used to navigate through the file system on your computer
Go back to the Jekyll Repository on Github (image 1) and copy the link (circled in blue). Flip back to your command prompt and type “git clone ” and then paste in the repository like so
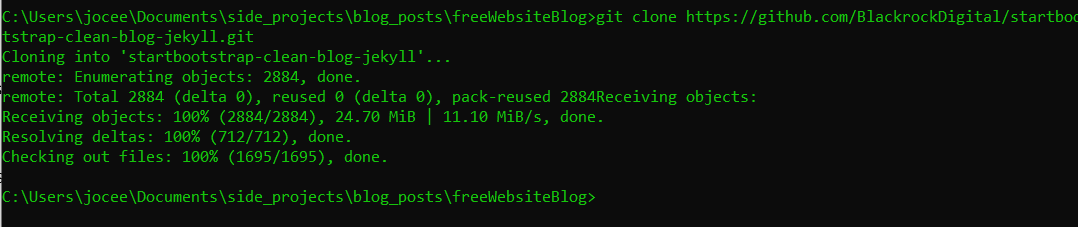
Git Clone is the standard way to pull code from another location. Think of how much time it saves to just type git clone instead of downloading and unzipping large files of code!
A bunch of magic will happen, and when “done” appears, the magic is complete. This will completely copy all the code from the website to your local computer. We are almost finished setting up the framework of your website.
Step 3: Getting into the code
Remember Visual Studio Code, which we downloaded in the beginning? Now it is time to use it. Open Visual Studio Code.
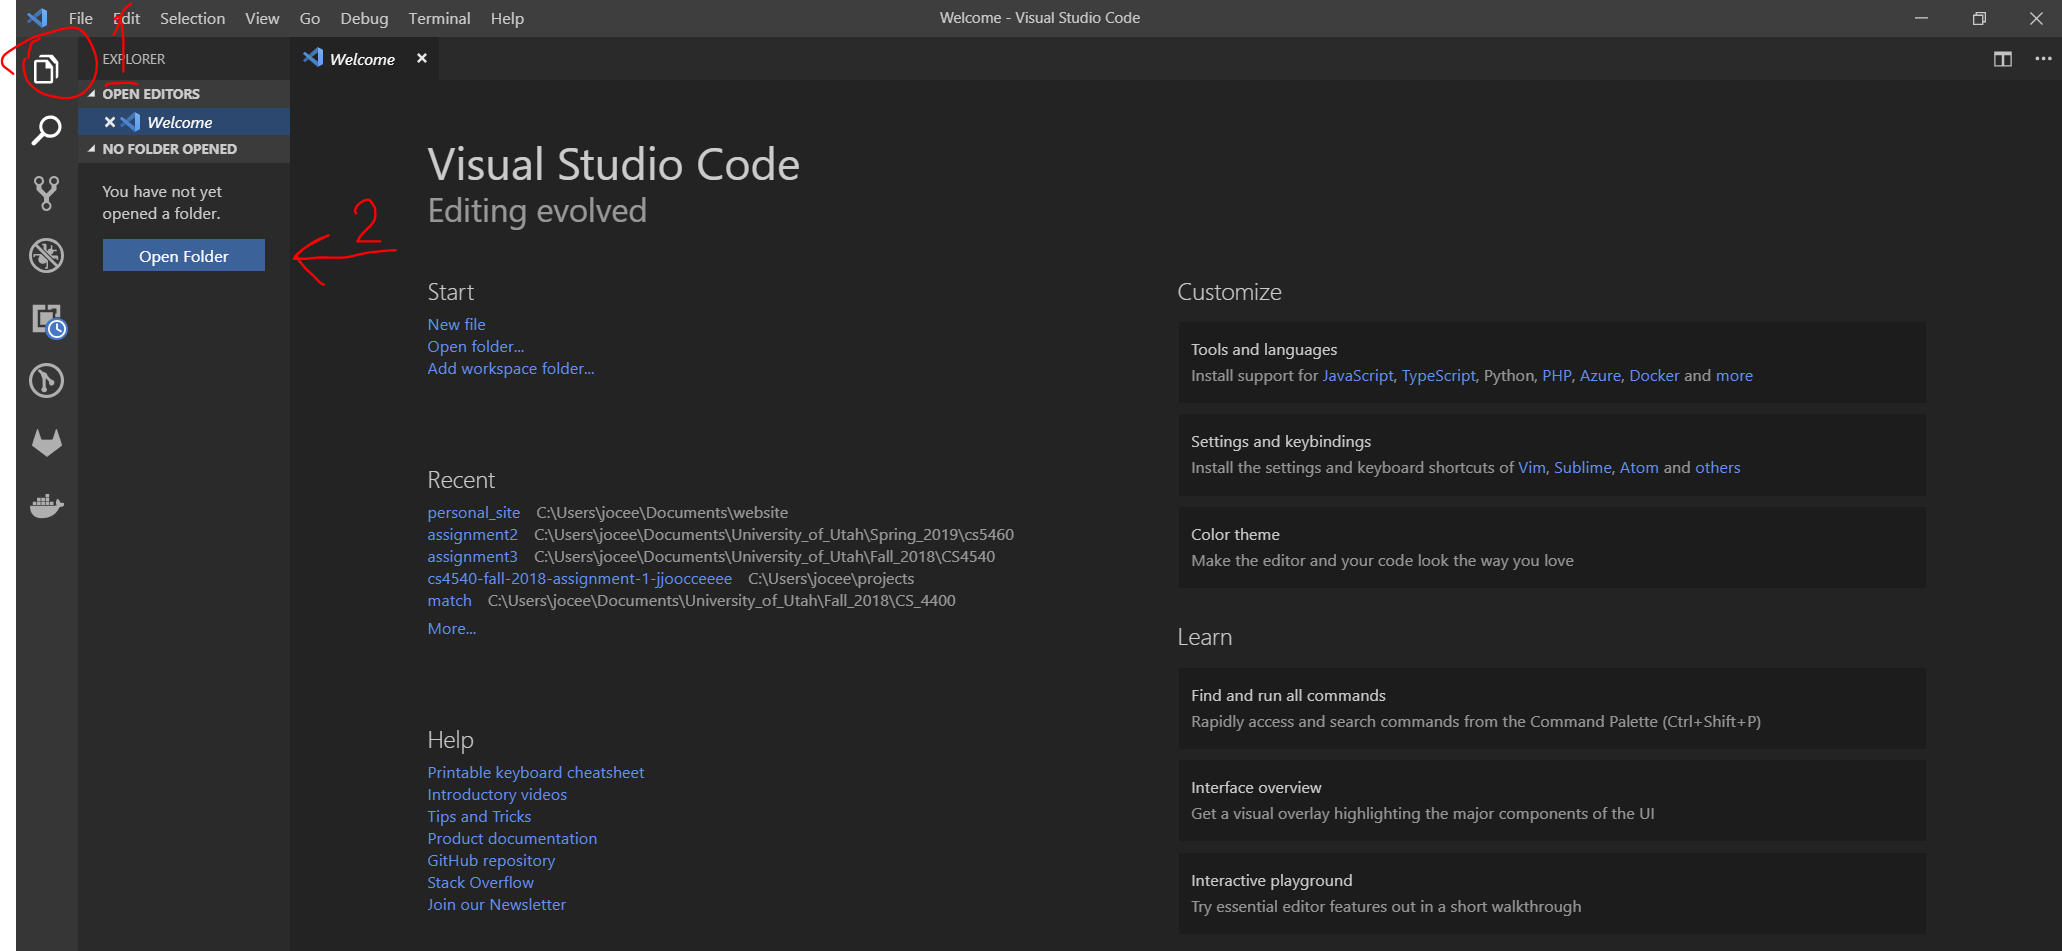
Visual Studio Code is a tool used to write code
Add the folder containing all the code you just copied. C:\Users\jocee\Documents\side_projects\blog_posts\freeWebsiteBlog\startbootstrap-clean-blog-jekyll Is where my code was stored. Once it has been added to Visual Studio Code, let’s expand the file so we can see all the folders we copied in the left view.
Project Structure
The most confusing part about web development, in my opinion, is the folder structure. There are so many files and folders which have certain names, and do certain things.
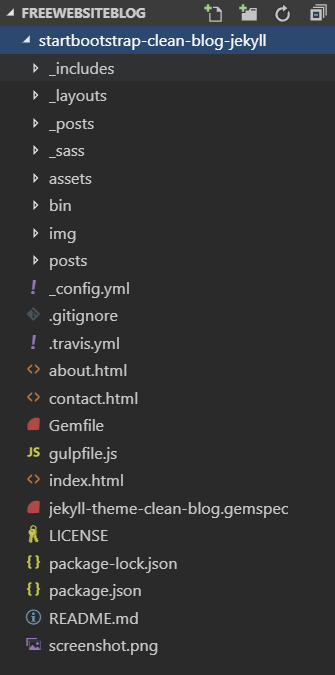
Jekyll has a very specific project structure. There are _includes, _layouts, _posts, etc.
For the most part, you can ignore most files and folders. They are just there to do the heavy lifting of creating a website for you, so you can do less work. A few basic things to note are:
- README.md is a certain type of file which will give you an explanation to how the code works. In our case, this file will contain customization options.
- Any file ending in .html is a template for what will be on your website: 404.html, contact.html, about.html, etc.
- The img folder will store any images you want on your blog
- The _posts folder is where you will add your blog posts.
Pretty simple right?
Okay, now for the fun part. Let's get your cloned blog up and running!
The README gives you the clues on how to run your site, but the steps should be as follows
- Make sure the correct theme is copied in the Gemfile (A gem file let’s your computer know what it needs to download in order to run your website. There are many moving pieces behind the scene that makes the website work, and these pieces are kept track here)
- Install all components in the Gemfile. By typing bundle install into your command prompt.
- A _config.ymlfile will be created during step 2 (if it doesn’t already exist). Replace the theme with the your blogs theme. In my case I had to add the theme entirely by adding the line theme: Jekyll-theme-clean-blog to the file on a random new line.
- Run the website by typing bundle exec jekyll serve
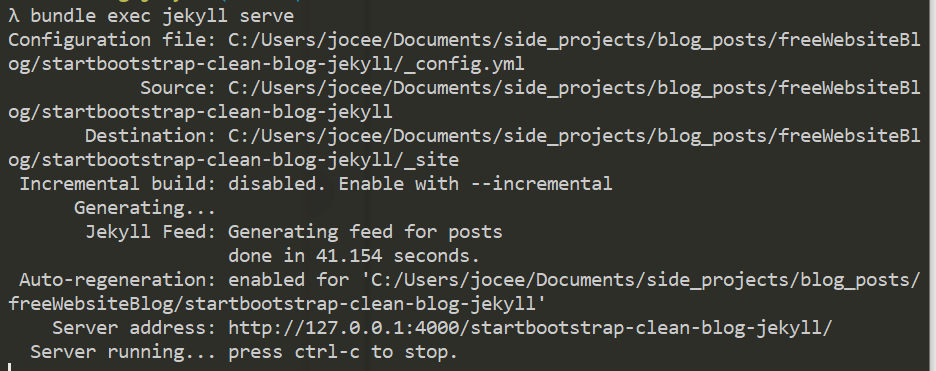
How to run your website locally
The command prompt will print out a bunch of stuff.. but don’t worry about most of it. This may take a moment or so to finish, but eventually you will see something like:
Server address: http://127.0.0.1:4000/startbootstrap-clean-blog-jekyll/ Server running... press ctrl-c to stop.
Hooray! The website is up and running….. locally. You’re website is available on your computer, but nowhere else. To see it, open up a browser, and type in the server address: http://127.0.0.1:4000/startbootstrap-clean-blog-jekyll/ You will see a blog with a few example posts! Awesome! Now we just need to customize it to be YOUR blog.
(This will continue running in the background. Every time you make a change to a file in Visual Studio Code and save it, the website will refresh with the new changes! Pretty cool huh?)

Example Blog
Customizing your blog
The following steps are all specific for the Clean Jekyll Themed Blog, any Jekyll theme you choose will be very similar, but not exactly the same. Consult the README.MD file for your theme to know the exact steps you should be taking. This section will be a useful reference about the basics of how a Jekyll Blog works if you are interested in learning more.
Creating a Post
In the _posts folder, is where each of your posts will be added. I still cheat for every new blog post I write, and copy an old file, rename it, and paste in the new blog post.
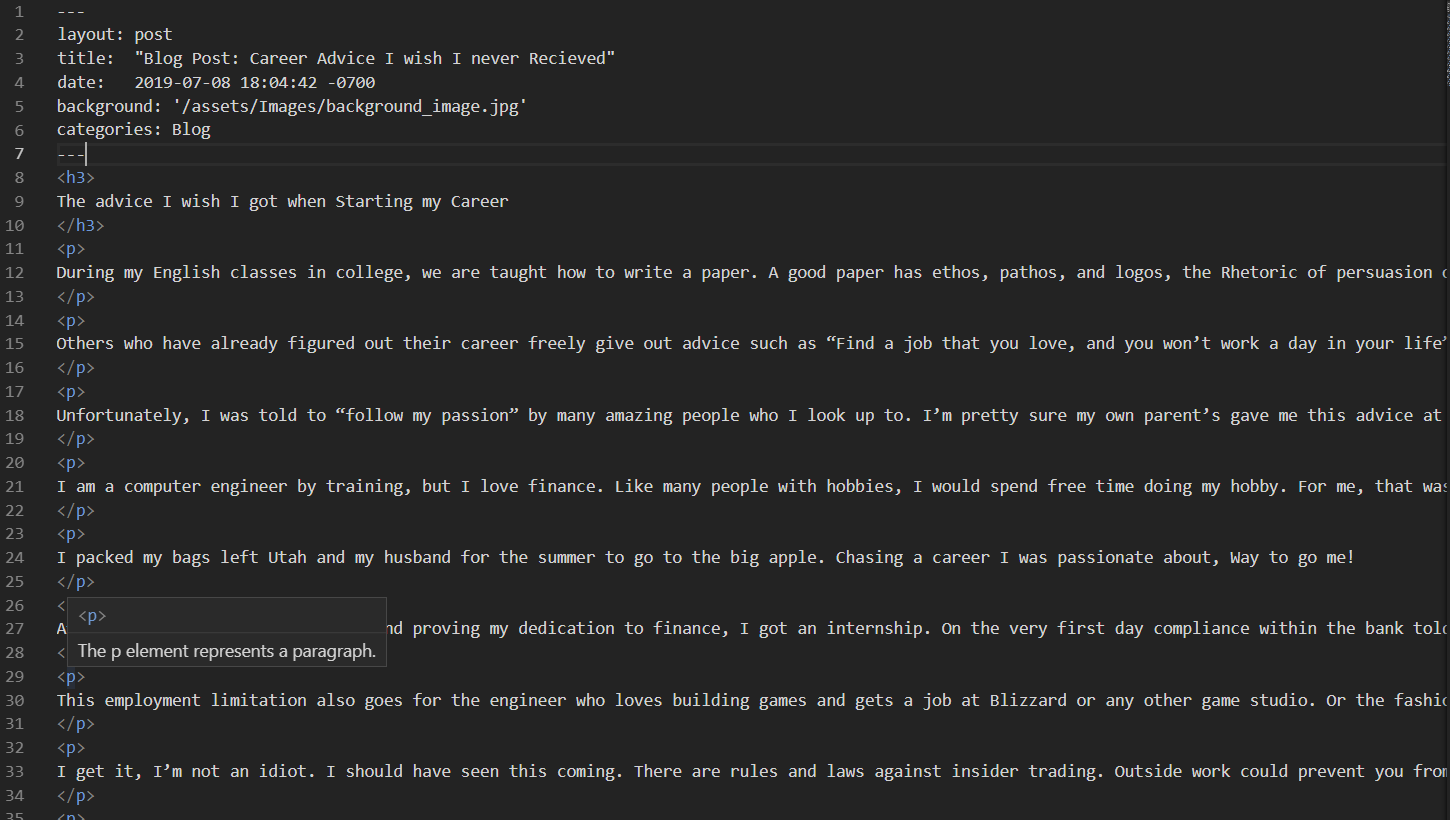
The header is super important. It is how the magic behind this code, it knows the page structure and details. For a Jekyll template, headers begin and end with “---"
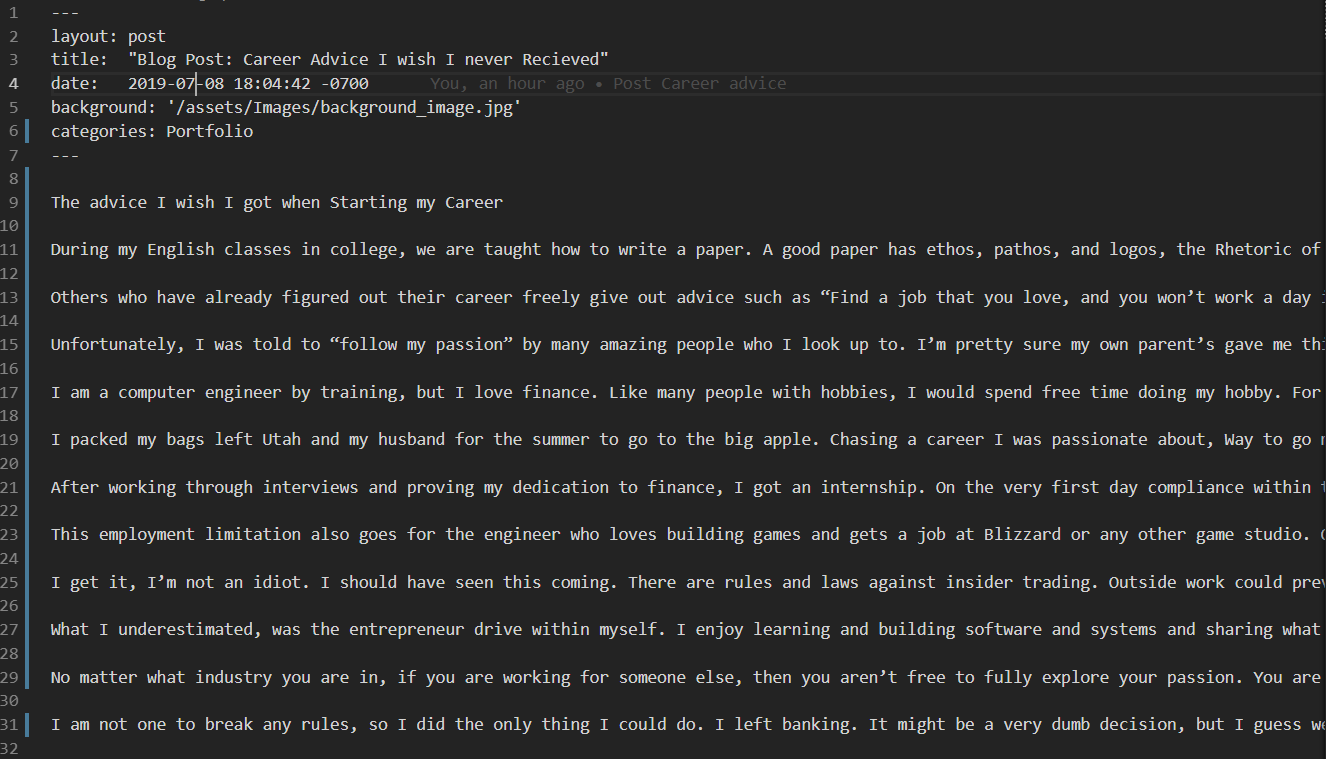
For the Clean blog Jekyll template I used This is how it looks:

Jekyll Header
Just change Title, date, and background keeping the same format.
Both Title and data are obvious what they are, but the background is less obvious. For this Clean Blog Template, this is the background image that appears at the top of the page.
Let’s break it down: What does '/assets/Images/background_image.jpg' mean?
In computers, everything is well organized. Including the folder structure. Everything between slashes / are folders, and the name at the very end with the file extension is the actual file. In this example, the background image is located inside the Images folder which is inside the assets folder. The file is named background_image.jpg. You can place an image anywhere, just make sure that you copy the path to it. To make this easier, you can use the file explorer to copy the image path (like we did earlier), and type on the name of the picture along with the extension.
HTML Basics
HTML is a language for computers. It stands for Hyper Text Markup Language. If you want to learn more about HTML, how it works, why it is this way, etc. then feel free to take an online course in HTML and CSS. I will only be showing you how to use HTML enough to get you a personal website up and running.
In HTML everything goes in tags < > < />
So when you want to write a paragraph, you add an opening paragraph tag, and end it with a closing paragraph tag, like so:
<p> I am a paragraph. </p>
Here is how my blog post looked different with and without paragraph tags
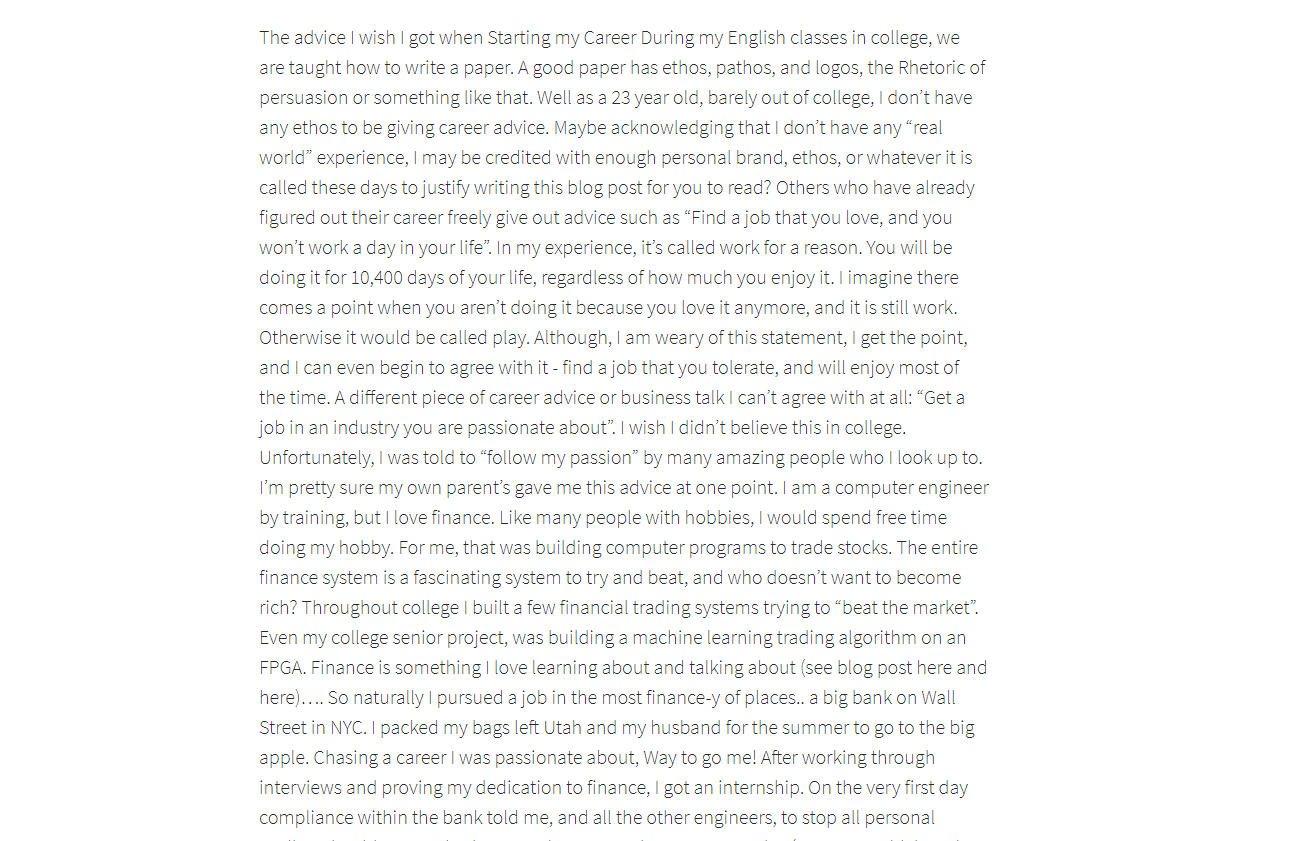
Blog without paragraph tags
Blog Code without paragraph tags
See how enters/spaces don’t create paragraphs? You need the <p></p> paragraph tags to designate a new paragraph.
Compare the above images, to when I do add paragraph tags
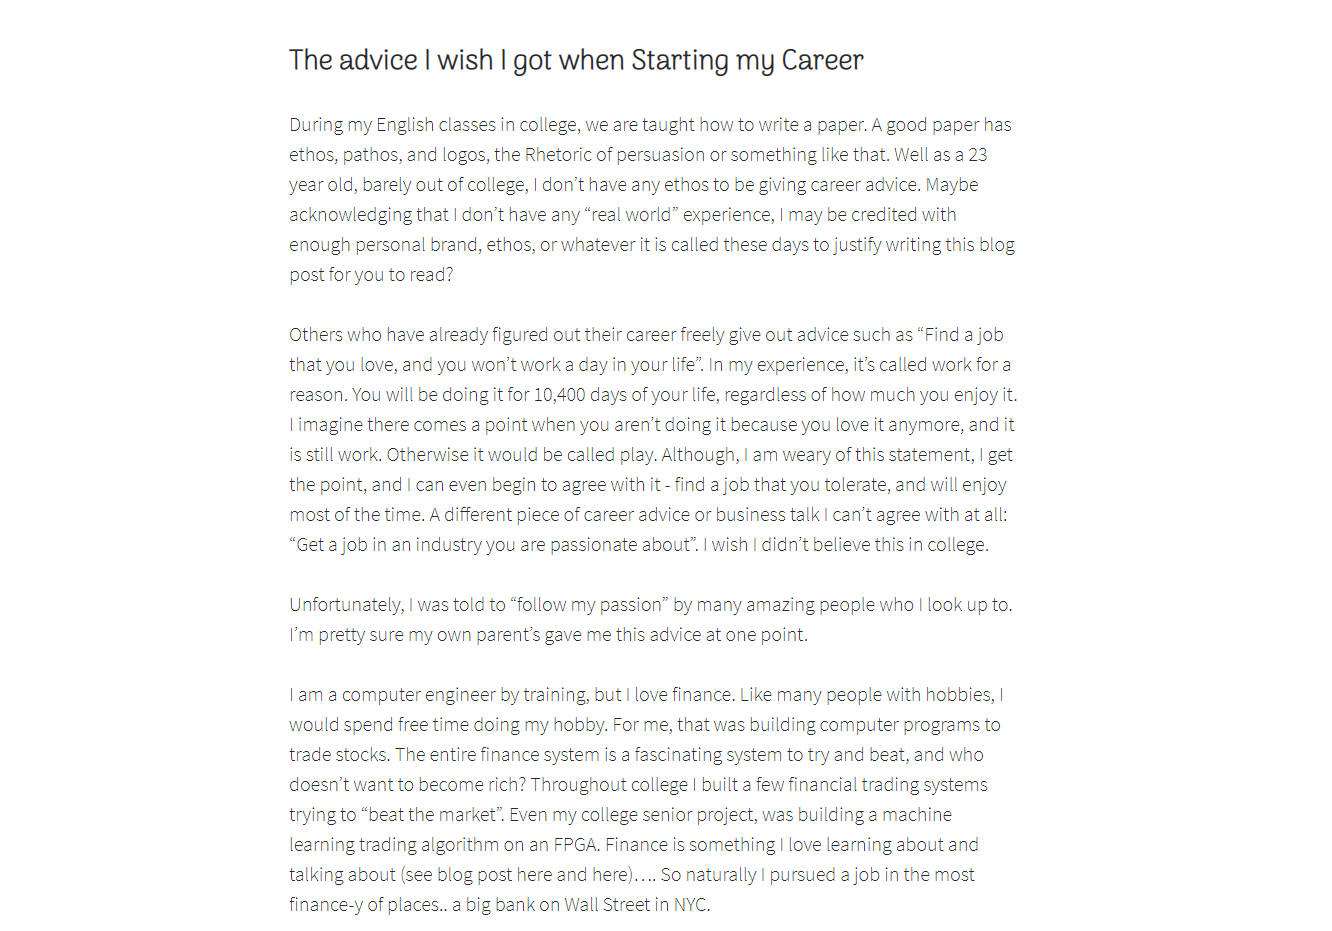
Blog with paragraph tags
Blog Code with paragraph tags
For anything in HTML there is a tag that goes with it, headers, images, forms, you name it. If you need to add something to your website, a good place to start would be to google “HTML tags ….” and just copy and paste the tags there. I will leave you to experiment with different tags you can use for your website. But here are a few starting points: <h1></h1> through <h5></h5> are header tags. They will be larger text, h1 is the largest header style, with h2 a bit smaller down to h5 which is the smallest.
Adding an Image
I keep all of my images in the assets folder. Some other themes keep them in an images folder. Regardless, they all do the same. Just an organized place to store the images you want in your blog.
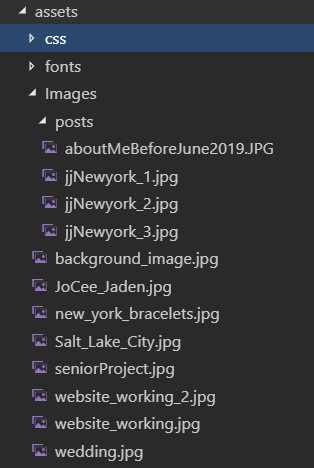
Image Folder Structure
Here is what my assets folder looks like. I keep all of my styling and customizations in this folder. I will go into how to add specific styles and looks to your website in another post. For now, we just need an Images folder. This contains all of the background images for the site. The posts folder contains all of the images in posts. You can be more organized than that, but it’s really up to you.
The pattern with these folders, is that they are just organization. I made it up for my needs. You can change the ordering and names, and it’s totally fine! We just need to provide a way for the website to know where to find your images.
Anywhere you want a picture in your post, you need to add an image tag <img>. Simple, like in the good ole days of MySpace. How the html knows what image to display, is with the src attribute inside the opening image tag. This will be the folder file structure for your website.
<img src="/assets/Images/posts/aboutMeBeforeJune2019.JPG" alt="Text that appears if the image doesn't load">
Go ahead and customize the about.html, and add a few _posts. The Readme.md also contains quite a few customization options like the name and description of your website. I'll be right here when you finish.
Deploying Your Website
Now that you have the perfect website, we need to let it out into the wild.
First, let’s save all the changes. After saving every file you edited (ctrl-s), we will commit the changes. You will run these commands every time you add a new post or change anything. In the command prompt type the following:
git add . git commit -m “Random message that will be saved with your changes”
Perfect! Now, remember the Github account that you created? We will need to go to your account, and create a repository for your website.
Adding a repository to store your website code
Add a repository name and description, then press create repository.
You will get to a place that looks like this:
Adding a repository to store your website code
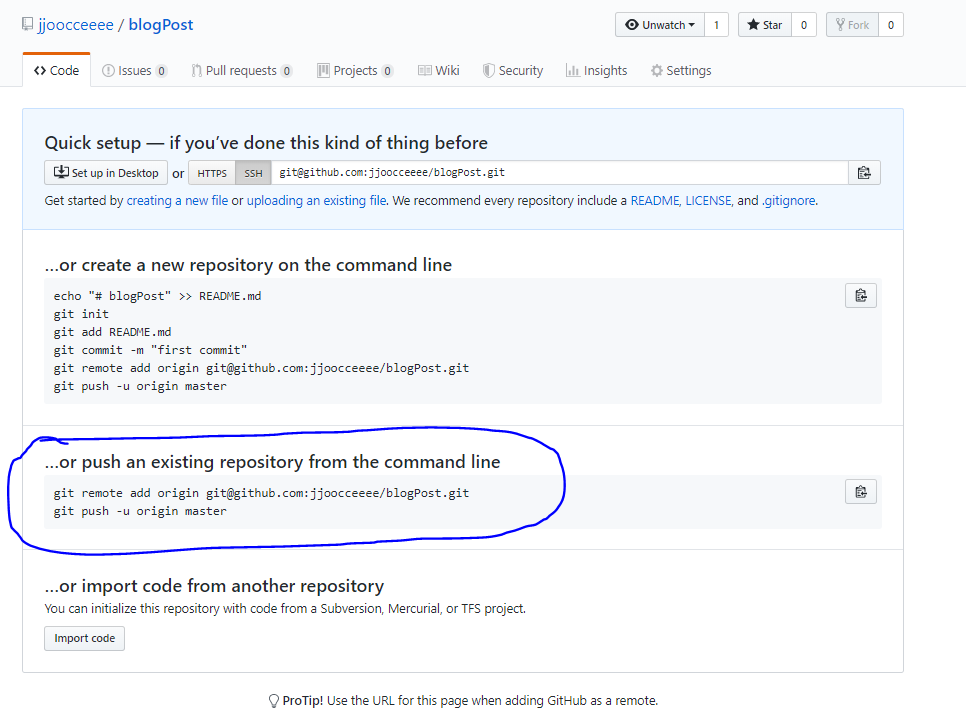
Now, we need to let our website know, that it has a home online. In the command prompt copy what is in the blue circle for your repository.
This will set the correct location for your website, and push the changes to that location. You will see something like this:
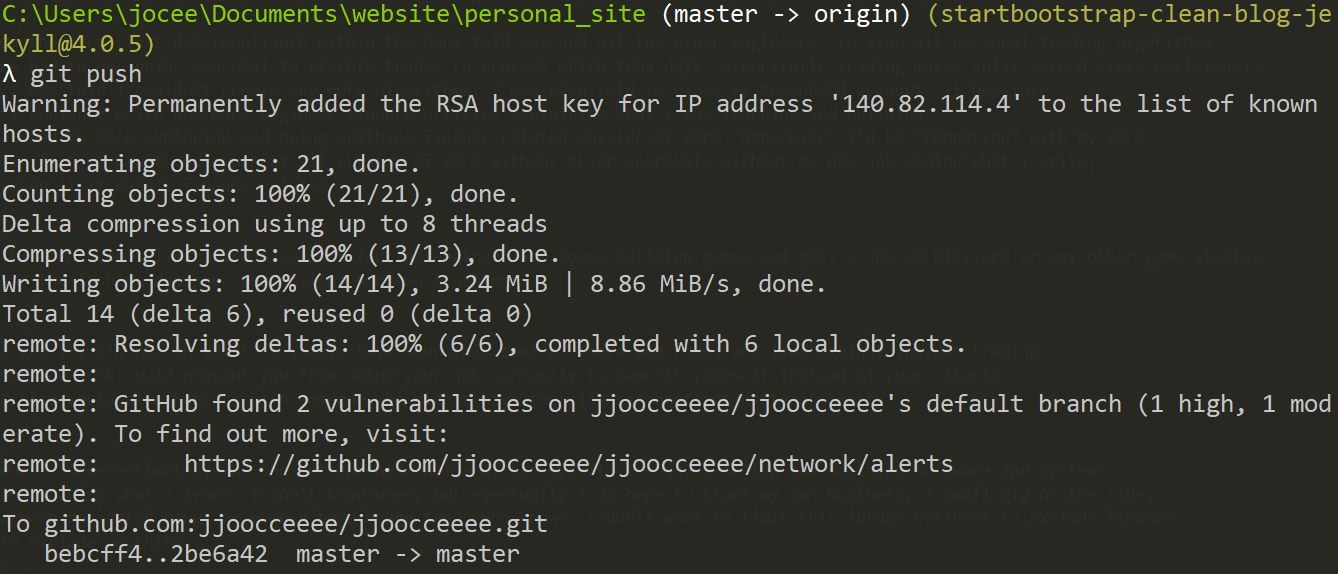
Git Push is the common way to post code to a repository
Okay, you are almost done! I know it has been a long tutorial, but we have covered and learnt so much! The last step is to let Github know that you want to use github pages to hose your site for free. Click the settings tab on the top right. Scroll down to the GitHub Pages section, and select the dropdown under source. Select the master branch.
Once your website is deployed, and ready, the green highlighted box will appear with the URL to your website. Now your website will be accessible from anywhere!

Github Pages hosts Websites for free
Ta-da! You now have a shiny, completely customizable, and free blog. It took a bit of work to get here, but along the way you learned many of the secrets to being a programmer. Congrats!
If you run into any troubles at all along the way, shoot me a DM on Instagram (@jocee.holladay) and I will walk you through the process and answer your questions.
-JoCee